Have you ever taken something plastic apart and noticed that the screws from one half just go into the plastic of the other half, and other times they go into a brass or metal insert that is sunk into the plastic?
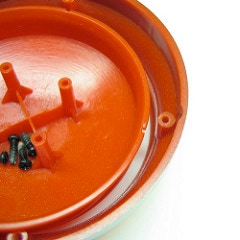
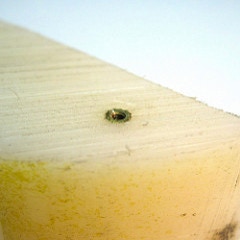
Basic threading into plastic joining method.
Notice the the plastic wearing out onto the screws.
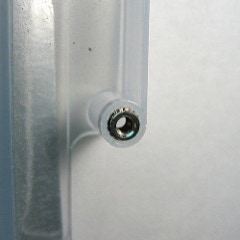
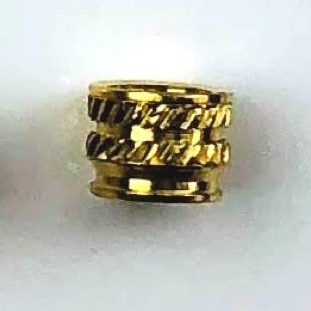
Pro method using a knurled insert.
Threading directly into plastic is OK, if you don’t need to open the project again. After a few cycles most often the plastic will crack or strip. But, chances are you will need to change batteries, reprogram chips or a make a multitude of other possible adjustments. That’s one of the cases where you need a threaded insert.


Threaded inserts are also used in materials that are too week to be threaded or that will wear out if taken apart too often.
Here are some examples:
• Ikea Furniture.
• Carbon fibre honey comb, used in high end jet aircraft.
• Workshop jigs and fixtures.
• Better plastic project cases.
• Plastic office machines
• Your projects where using a bolt or tapping are not options.
Used on a IKEA Table
Table is made from particle board which is too weak to be bolted directly into.
There are two basic types of inserts;
• Threaded
• Knurled
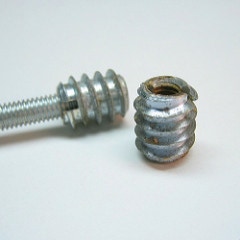
Threaded inserts:
These are made by DuoBro and sold at hobby shops, their intended use is wooden RC planes.
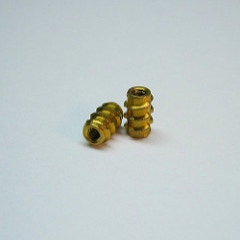
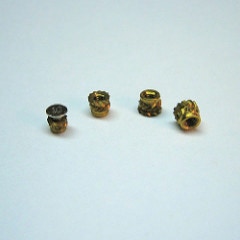
Knurled inserts:
These are from a white Apple iBook G3, and where moulded into the case plastics.
I’m not going to cover threaded inserts in to much depth here, but to use them you basically screwed them into your project and the fastening bolts are screwed into them. Threaded inserts are well suited when you working with wood.
Knurled inserts are either moulded, press fit or glued into place.
If your project permits, you can find small threaded inserts at hobby shops, or larger ones at hardware stores. On the other hand if you want to use a knurled insert (or very small ones), I’ve found them hard to find so I been pulling them out of junked equipment.
Here’s how,
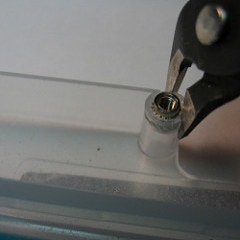
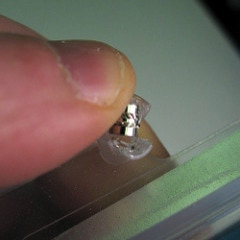
Find the insert you would like to use. Using a pair of sharp snips, start by cutting it out by cutting a little off centre. This is important, if you try to cut it out from the middle you will probably deform the insert, especially if it is made of brass.
What you want is to peel the plastic away by touching the metal as little as possible.
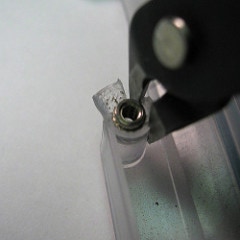
Make the second cut so that it meets the first cut.
The insert is almost free.
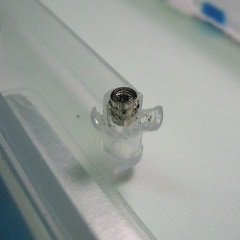
At this point you should be able to force it out with your fingers.
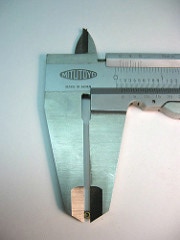
Measure the smallest part of the insert you are going to use. Use this measurement to select a drill bit.
Drill a hole to receive the insert into your project. If it is a “blind” hole, make sure to go a little deeper to allow for cement or other particles that may end up impeding the bolt that will be fastened to it.

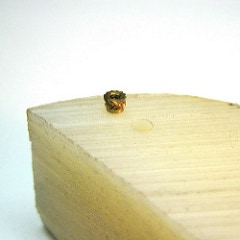
Notice that the smooth part of this insert can be “thumb” pressed into the hole but knurls stop it from going further.
You may think “Why not use a smaller hole and force it?”, because the plastic will bulge up around the insert and you won’t have a flat surface any longer.
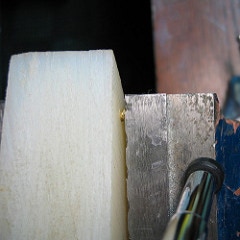
The next step is to press the insert into the project. If you don’t have a press, a bench vise is capable of applying lots of pressure. The project is placed into the vise and then the jaws are closed to force the insert into the work.
It’s a good idea to cover the top of the insert so that it don’t become damaged by the steel jaws of the vise.
It’s ready!
When the first edition of this page was written 3D printing was a far off idea. But now that 3D printing has been around for quite some time I’m using inserts in almost all of my projects.
Rather than prying them out of old electronics cases (which I still do if there is a size I need and do not have), I order them from McMaster-Carr. McMaster-Carr is an online tool and supply vendor that has a mind blowing assortment of products. One category of these products is brass-inserts. The heat-set version are great for 3D printed projects.

To use them, make a hole in your 3D part in the drawing software that you are using. Making a hole in the part while drawing is better then simply drilling a hole afterwords. When the G-code file that you feed to your 3D printer is being created it puts a wall on the inside of your hole. This is important so that the insert has something to grab onto. When you just drill a hole in a 3D printed part you often end up in a void inside the part and the insert will fall out easily or not stay in at all.
To use a heat-set insert you heat the insert and push it into the plastic part. It is important that the hole be close to the correct size. If it is too big - well you guessed it. But, if it is too small (more plastic to hold != great), the treads on the inside of the insert will often become ruined by plastic. Forcing a screw though a mess of plastic can rip out the insert.
The tool end (photo to right) is meant to fit into a soldering iron. The thin end is the size of the internal bore of the insert. This is used to heat and press the insert into the plastic.
I’ve never used it (does not fit my soldering iron), yet I have installed 100’s of inserts. What I do is place the insert on the end of my regular soldering iron tip and simply press. It works, but you do have to be careful that it goes in straight.


Press Fit
This is part of an X-Y style drilling / milling machine that I’m working on. Since I’ve had to take it part often while working on it, I used threaded inserts in the plastic parts that were milled on a drill press.
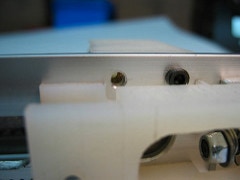
Press Fit:
Here is the same part that is in the left photo. But here it is placed on the bridge that has the steeper motor and drive belt. Notice the hole with no bolt, though this hole you can see a bit of the knurled insert.


Heat Set:
All of these are examples of heat-set inserts in 3D printed parts. Top and left are parts for robotic arm projects. The bottom right (the insert is not visible) is a casing built for a custom client project. This project requires a lot of opening of the casing during the prototyping phase so inserts where used in the 3D printed PLA case to make installing and removing the laser cut acrylic top case easier.
Copyright SpikenzieLabs 2019
