
The iPhone 5 takes such awesome HD video, we decided that it’s time to craft our very own tripod mount. A while back, we found a very technical PDF technical drawing of the iPhone 5. Stripping the drawing down to a single bare outline in a vector drawing software took a few minutes.

Below is what we ended up with. The spacing around the buttons has been exaggerated. This to facilitate loading the iPhone into the acrylic holder.

Using this as the ‘void’ (What we are cutting out of a few layers of acrylic) the housing is built around it.
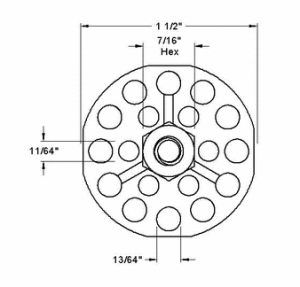
McMaster-Carr has these awesome ‘Weld Nuts’. We had a few laying around the shop from a prototype we designed for a client. These weld nuts have the same threading as most standard tripod mount plates. Ideal for DIY folks that want to extend the usage of a simple tripod.
The tripod mount we made is comprised of three layers of acrylic. Seen below, from right to left. The backing has a cut out for the lens, and keeps the iPhone from falling out. The main layer which has the iPhone footprint is from 1/4″ acrylic. Top layer is from 1/8″ and we made some 1/4″ acrylic fingers that keep the phone from popping out the top.

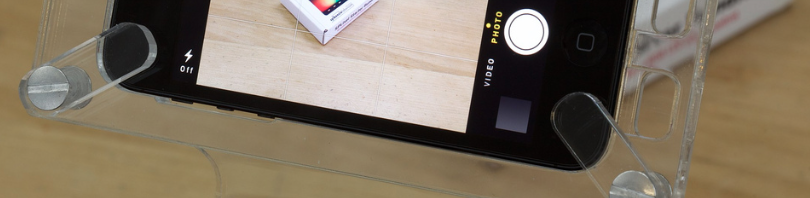
For usability, we added two sound holes, seen in the photo below.:

There are a few ‘gramophone’ looking iPhone holders that use a similar concept for directing sound out of the iPhone. In this case, we are directing sound in towards the onboard mic. Works surprisingly well.

Secured to the tripod, before the iPhone is installed.
The ‘fingers’ swivel on a binding post. Once again, McMaster-Carr has these listed in varying thicknesses and widths. They swivel nicely, and if the self-loosen, well there’s some thread lock just waiting to be cracked open here.
What about the nifty right-angle bend? Acrylic has some great properties to it. I had the tripod mount part hanging over a shop table, and with some gentle coaxing with a heat gun, about 2 minutes worth, the bend in the acrylic can be made with the pressure from one finger. After it cools, the new shape is permanent. There is even some ‘work time’ much like epoxy before it sets hard.
The 1/16″ washers take up just the remaining amount of height in the binding posts. It’s great to have a variety of acrylic thicknesses around. It is surprising how frequently you need a washer.
 Here is a PDF file so that you can make your own, or add to this one as you like. One of the next features we want to add is a set of high output diffused LED lights. Perhaps even a lightning connector accessible version.
Enjoy, and tag us on twitter @spikenzielabs with pics and how yours came out.